Posted on — Leave a comment

The Shape of Steeping: Why Whole Botanicals Are Better

When it comes to herbal infusions, the physical shape of the herb dictates the quality of your brew. There is a world of difference between ingredients that have been mechanically chopped into uniform fragments and botanicals kept completely intact. Understanding how plant anatomy and cellular structures behave in hot water is the key to unlocking the true science behind a proper steep.

1. Cut-and-Sifted Leaves: Fractured Elements

Loose-leaf herbs labeled as “coarse cut” or “cut-and-sifted” undergo mechanical chopping to fracture the leaves into smaller fragments. While this makes them easy to scoop, it structurally compromises the plant’s natural cellular armor.

This mechanical tearing breaks open the plant’s veins and exposes its delicate interior tissues directly to oxygen, causing rapid oxidation. Over time, the volatile compounds dry out and evaporate into the air. While cut-and-sifted herbs release basic flavor compounds quickly because their internal cellular boundaries are already ruptured, the full therapeutic depth and the nuanced, aromatic top notes of the botanical are lost to the atmosphere long before they ever reach your mug.

2. Whole Botanicals: Sealed Cellular Vigor

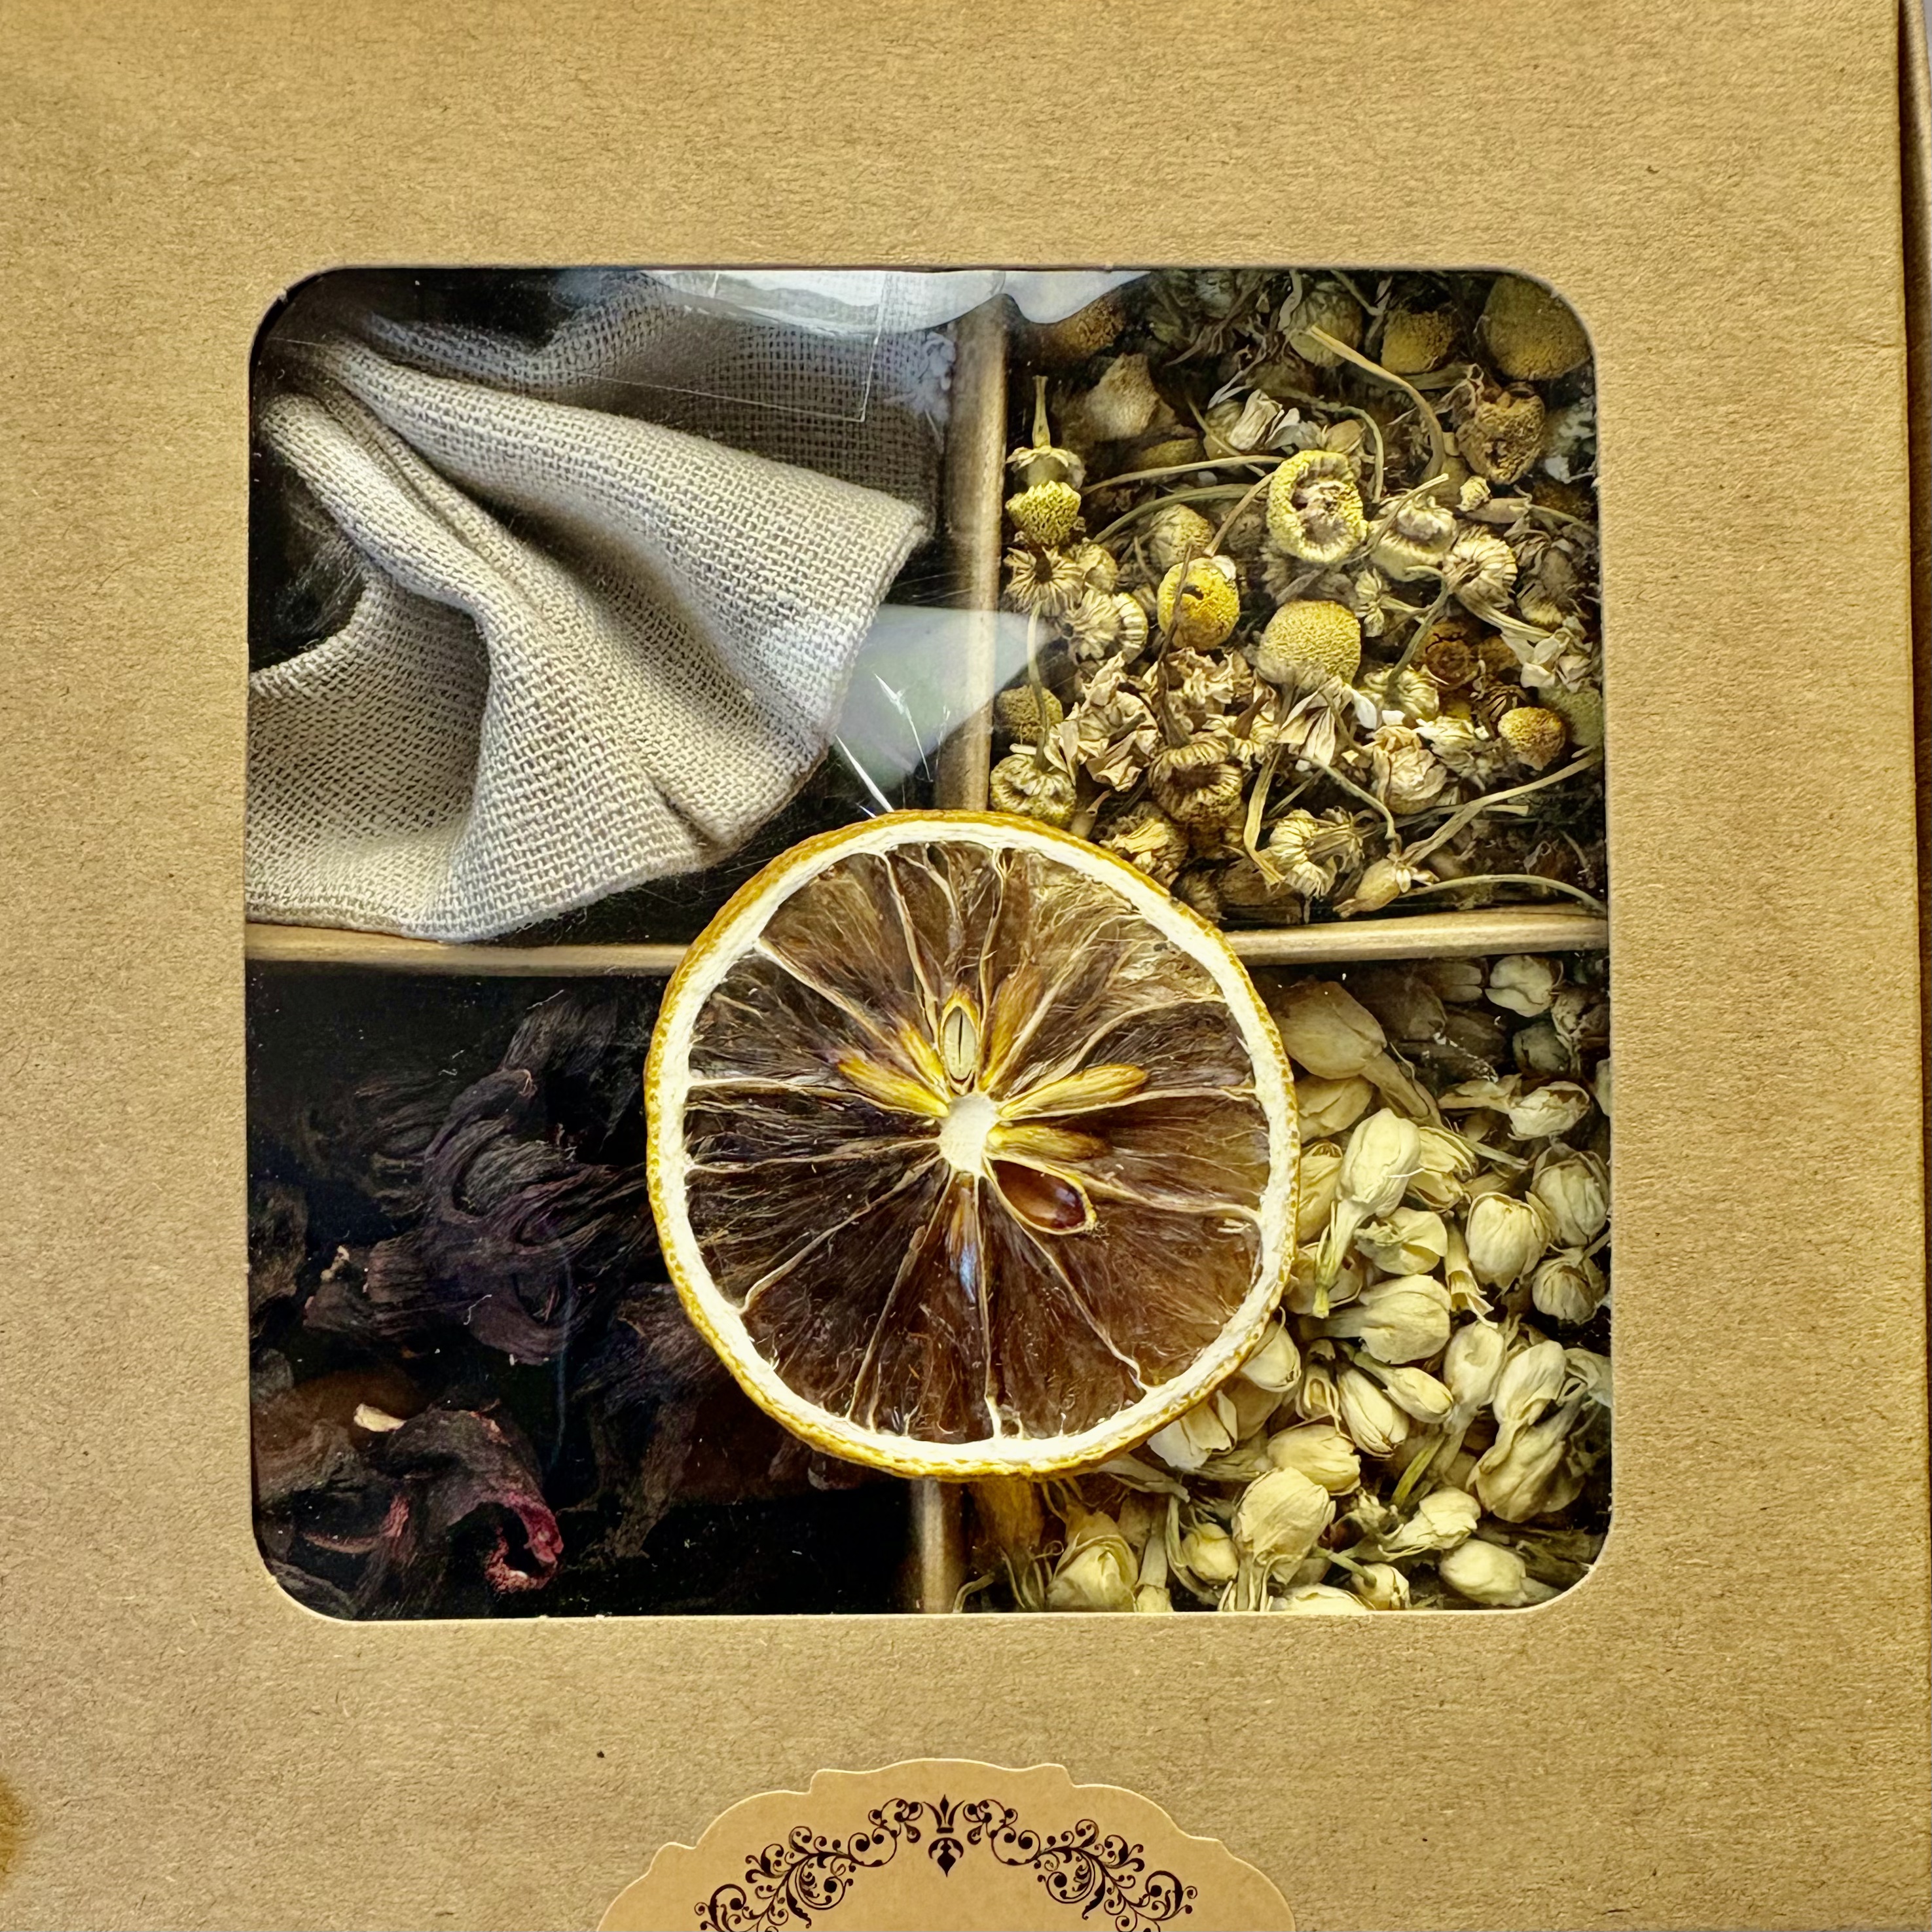
Steeping whole, intact botanicals—whether they are fragile flower buds, robust leaves, or gently dehydrated fruits—is an entirely different sensory and biological experience.

When an herb is harvested carefully by hand and air-dried completely whole, its protective cellular walls remain entirely uncompromised. The microscopic storage vaults on the plant’s surface, known as glandular trichomes or oil pockets, remain sealed. These structures manufacture and lock in the plant’s volatile essential oils, keeping them safe from heat, light, and air.

The Chemistry of the Whole Botanical

When hot water pours over a whole botanical, it doesn’t instantly flush out the nutrients. Instead, it must slowly permeate the outer cellular membrane via osmosis, rehydrating the structure from the outside in. This gradual extraction process cleanly coaxes out heavy, complex essential oils alongside water-soluble phytochemicals like apigenin (the calming compound in chamomile), d-limonene (the uplifting compound in citrus), and anthocyanins (the vibrant antioxidants in hibiscus).

  • The Result: The reward is a clean, oil-rich liquor that actually retains its biological benefits. You will often notice a shimmering, iridescent sheen floating on the surface of a whole-botanical brew—this is a visible layer of pure essential oils packed with calming, aromatic, and anti-inflammatory compounds.

How to Properly Steep Whole Botanicals

Because whole botanicals are tightly sealed biological vaults, they cannot be rushed. To maximize the extraction of these precious compounds, your brewing technique must adapt to the plant’s science:

  • Time: Extend your steep time. Whole herbs require 5 to 10 minutes to completely saturate, swell, unfurl, and release their deep-seated internal oils and natural sugars.
  • Trapping the Steam: Always cover your mug or teapot while brewing. Because the therapeutic essential oils are volatile, they easily turn into gas. If you leave the vessel open, the rising steam will carry those precious compounds right out of your cup and into the room. Keeping a lid on forces the rising oils to condense on the underside of the cover and drip back down into your tea.

Slowing down to steep whole botanicals transforms a mindless habit into an active ritual. By honoring the natural, unbroken shape of the plant, you ensure that every sip delivers the exact flavor, aroma, and therapeutic properties nature intended.


Learn More on our site through our self-led educational modules!

Beyond the Teabag: Intermediate Course in Tea & Glycerites

Original price was: $45.00.Current price is: $40.00.

If you’ve already made a facial steam or a bath tea with our loose herbs, you know the basics of infusion. This is the next level: steeping herbs properly as tea — the ratios, the timing, the water temperature that actually matters — and then learning the one trick most home tea drinkers never try: finishing a cup with a glycerite instead of honey or sugar.
Posted on — Leave a comment

Burning the Bloom: Whole Flowers for Ritual Incense

Most loose incense blends available on the market today follow a predictable formula. They are composed of ground-up leaf fragments, wood sawdust, or charcoal powders heavily drenched in synthetic fragrance oils. While these commercial mixtures burn easily and uniformly, they lack the raw, complex botanical soul of a living plant. The synthetic scents hit the nose quickly, but they burn off flat, often leaving a heavy, chemical residue in the air.

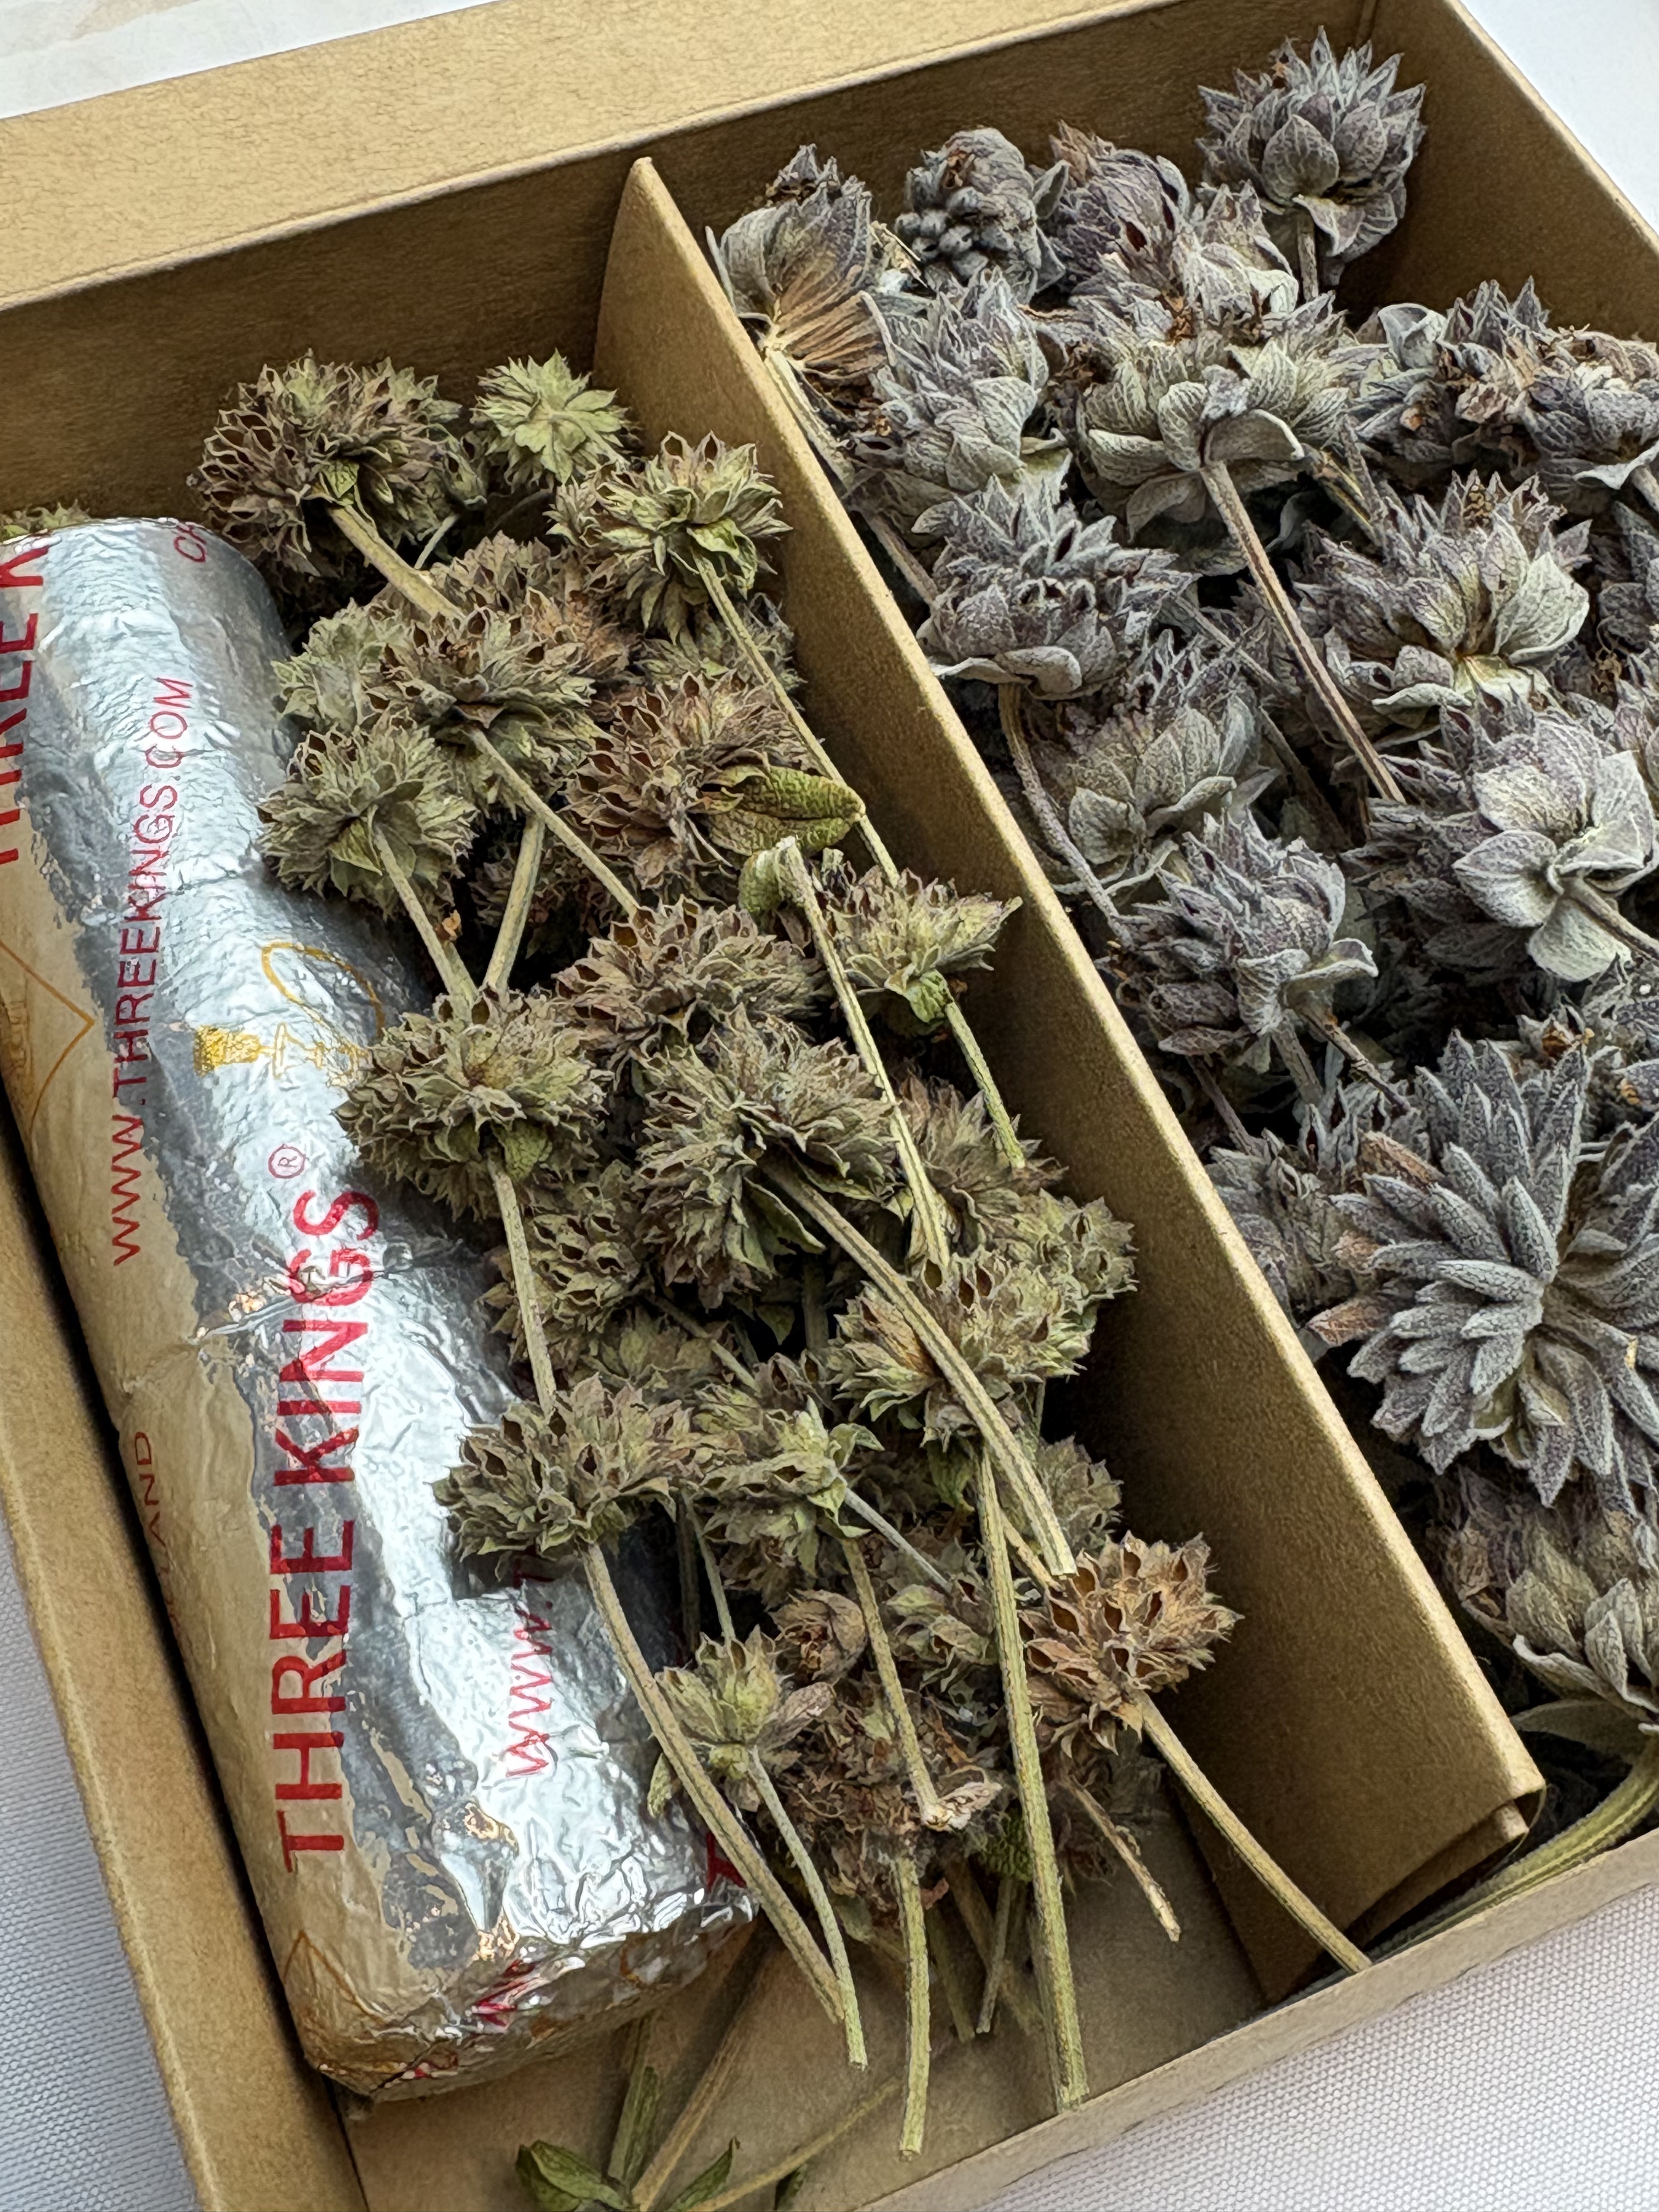
In our private garden, we approach smoke rituals from an entirely different perspective. We bypass the leaf grinders and instead harvest the intact, structural flower whorls of Black Sage (Salvia mellifera) and Cleveland Sage (Salvia clevelandii) at the absolute peak of their summer bloom cycle. We air-dry them completely whole, specifically to create our flower incense boxes.

When you place an intact, whole dried sage flower directly onto a glowing charcoal disk, you aren’t just burning kindling. You are triggering a thermochemical release of raw essential oils and sticky botanical resins sealed deep inside the blossom’s calyx. Inside those same dried flower whorls sit the sage seeds—tiny vessels holding the genetic blueprint of the plant. Structurally, these seeds are encased within the protective calyx walls, surrounded by trichomes (microscopic glandular structures) that secrete defense chemicals like monoterpenes and diterpenes. To save these seeds for growing, they must be shaken free from the dry calyx. However, when left intact within the bloom for ritual use, the heat causes these oil-rich trichomes to burst, and the seeds add a crackling, rustic texture to the burn. As the heat hits the bloom, the natural resins slowly melt, oxidize, and caramelize before turning to smoke, releasing a layered fragrance profile that shifts and evolves as it smolders.

The two native sages offer completely distinct energetic and chemical experiences:

  • Black Sage Flowers: These dark, resinous whorls deliver a deep, grounding, and intensely peppery-sweet smoke. It is heavily dominated by chemical compounds like camphor and 1,8-cineole, creating a heavy, anchoring aroma that excels at quieting an overactive mind, drawing your focus inward, and settling a room before meditation or late-night journaling.

  • Cleveland Sage Flowers: These elegant, stacked amethyst blossoms release an incredibly sharp, exhilaratingly sweet, and clearing aroma. Its unique profile features high levels of specific volatile monoterpenoids that cut through stagnant, heavy indoor energy instantly, making it perfect for morning rituals, clearing a workspace, or resetting the home after a long week.

Beyond the rich aroma, watching whole botanical structures gently transform on a charcoal disk offers a captivating visual meditation. You see the delicate petals singe, the resin bubble, and the smoke rise directly from the heart of the flower. It is an unadulterated sensory experience that strips away the artificial world and reconnects you directly to the raw, rugged chemistry of the earth.

Posted on — Leave a comment

The Difference Between a Toner & Hydrosol (+Why It Matters)

If you’ve swapped a drugstore toner for a hydrosol, you might be surprised how different they actually are — not just in scent, but in what they’re doing to your skin.

The science, briefly:

Most conventional toners rely on alcohol (ethanol or similar) as a base. Alcohol evaporates quickly, and as it does, it pulls surface moisture from your skin along with it — that’s the “tightening” sensation many people mistake for a toner “working.” In reality, it’s mild dehydration, and skin often overcompensates by producing more oil to make up for the moisture it just lost, which can leave oily or acne-prone skin worse off over time, not better.

Why hydrosols?

A hydrosol is produced through steam distillation: steam passes through plant material, carrying water-soluble aromatic compounds and trace plant constituents with it, then condenses back into liquid. There’s no alcohol involved, so there’s no evaporative stripping effect — the water is simply carrying the plant’s properties rather than pulling anything out of your skin.

The practical difference:

  • Toners are typically wiped on and left to dry, doing their work as the alcohol evaporates.
  • Hydrosols work best misted generously, then locked in immediately with a moisturizer — since there’s no alcohol to “activate” it, the water itself needs to be sealed in with a moisturizer before it evaporates on its own and takes the benefit with it.

If your skin has ever felt tight or dry after using a toner, that’s often the alcohol talking. A hydrosol, used the right way, hydrates instead of stripping.

Posted on — Leave a comment

Clearing the Air

The Benefits of Burning Black Sage and Cleveland Sage

Not all sage smells the same, and once you’ve smelled Black Sage and Cleveland Sage side by side, you’ll never mix them up again. They come from different plants entirely, they carry different aromatic profiles, and they tend to suit different moods and moments. Knowing the difference makes your smoke-cleansing practice a lot more intentional — and a lot more enjoyable.

Black Sage: Earthy, Grounding, Deep

Black Sage (Salvia mellifera) has a dark, resinous, almost bittersweet aroma — earthy in the way that wet soil or dried herbs from the back of a pantry are earthy. It’s a heavier scent, less sweet and more grounded, and it tends to fill a room with a dense, lingering presence.

This makes Black Sage a good choice for:

  • End-of-day wind-downs, when you want a heavier, more settling atmosphere
  • Clearing a space after a stressful stretch, when you want something that feels substantial rather than light
  • Moments when you want the scent to really saturate a room, not just pass through it

Cleveland Sage: Sweet, Floral, Bright

Cleveland Sage (Salvia clevelandii), by contrast, is famous among gardeners and herbalists for smelling almost fruity — bright, sweet, with floral and citrus-like top notes that sit much lighter in the air than Black Sage’s deep register. It’s often described as one of the most pleasant-smelling sages precisely because it reads as sweet rather than smoky.

This makes Cleveland Sage a better fit for:

  • Morning or daytime use, when you want to freshen a space without a heavy aroma
  • Smaller rooms, where a lighter scent won’t feel overwhelming
  • Anyone who finds traditional sage smoke too sharp or smoky — Cleveland’s sweetness is a gentler entry point.

Burning them side by side is genuinely one of the best ways to understand the range within “sage” as a category — they’re not interchangeable, they’re complementary, and having both on hand means you can match the scent to the moment rather than defaulting to whatever’s available.

How to Properly Use Charcoal Disks

If you’re used to loose-leaf sage bundles, charcoal disks are a different (and for incense, necessary) tool. Here’s how to use them safely and correctly:

  1. Set up a heatproof vessel. You’ll need a heat-safe bowl or censer, ideally with a layer of sand, ash, or salt at the bottom — charcoal disks burn extremely hot, and this insulating layer protects whatever surface the vessel is sitting on.
  2. Light the edge of the disk directly, holding it with tongs or tweezers rather than your fingers. You’ll see small sparks travel across the surface — that’s the charcoal catching.
  3. Wait for it to fully ignite. This takes a couple of minutes. The disk will turn ashy grey and you’ll see a faint glow across its surface — that’s your sign it’s ready.
  4. Place a small amount of the sage flower incense directly on top of the hot disk. You only need a pinch at a time; the heat will release smoke and aroma almost immediately. Adding too much at once can smother the coal or produce excess smoke.
  5. Replenish in small amounts as the herb burns off, rather than piling it all on at the start. This gives you a longer, more controlled burn and lets you gauge the aroma as you go.
  6. Ventilate the room — crack a window or door. Charcoal disks produce real heat and smoke, and airflow keeps the experience pleasant rather than overwhelming.
  7. Never leave a lit charcoal disk unattended, and let it burn out completely and cool before disposing of it in a non-flammable container.

Choosing Between Them

If you’re new to both, a simple rule of thumb: reach for Cleveland Sage when you want to lighten a space, and Black Sage when you want to ground it. Our Sage Flower Incense Box includes both, specifically so you’re not stuck guessing which mood you’re in before you’ve even lit anything — you can match the burn to the moment instead of the other way around.


Posted on — Leave a comment

The Anatomy of Intention

Setting a Daily Altar Ritual with Herbal Chime Candles

There’s a particular kind of chaos that builds up in a room over a week — mail piled on a surface, half-finished cups of tea, the general residue of a life being lived quickly. Most of us never notice it until we sit down to actually be still, and suddenly the clutter feels loud. Before you can set an intention for your day, you have to clear a space for it — literally.

Why the Physical Space Matters More Than You Think

It’s tempting to think of ritual as something purely mental — a mindset you switch into wherever you happen to be. But intention-setting works best when it has a place. A dedicated altar space, even a small one, does something practical: it trains your nervous system to associate that spot with stillness. Over time, sitting down in front of it becomes a cue, the way a certain chair might cue you to read, or a particular mug might cue you to slow down. You don’t need a dedicated room or an elaborate setup. A small table, a shelf corner, even a windowsill can work.

What matters is:

  • It’s cleared of unrelated clutter. Bills, chargers, and to-do lists don’t belong in this spot — their presence pulls your attention back into obligation.
  • It’s used consistently. The same spot, ideally around the same time each day, builds the association faster than a different spot every time.
  • It holds only what supports the ritual. A candle, maybe a small object with meaning to you, and nothing else competing for attention.

Once the space is clear, you need something to mark the beginning of the ritual — a signal that tells your mind, “we’re switching modes now.” This is where a candle becomes more useful than almost anything else you could put on that shelf.

Why a Candle Is the Ideal Time-Bound Tool

A candle does something a phone timer or a mental note can’t: it gives your intention a physical, visible container. When you light it, you’re not just starting a ritual — you’re watching time made visible. The flame is a promise with a built-in endpoint. You know, without checking a clock, that this practice has a beginning and it will have an end, and that structure alone makes it easier to actually sit still instead of wondering how much longer you “should” meditate.

This is specifically why a chime taper — a slim, quick-burning candle — works better for a daily practice than a large pillar candle. A chime candle burns for roughly 60 to 90 minutes total, but even a short session of 10–15 minutes gives you a visible marker: the wax has dropped, the flame has been present, something has happened. It’s sized for a daily habit, not a one-time event — you’re not committing to babysit a candle for hours, and you’re not left with a half-burned pillar guilt-tripping you from the shelf.

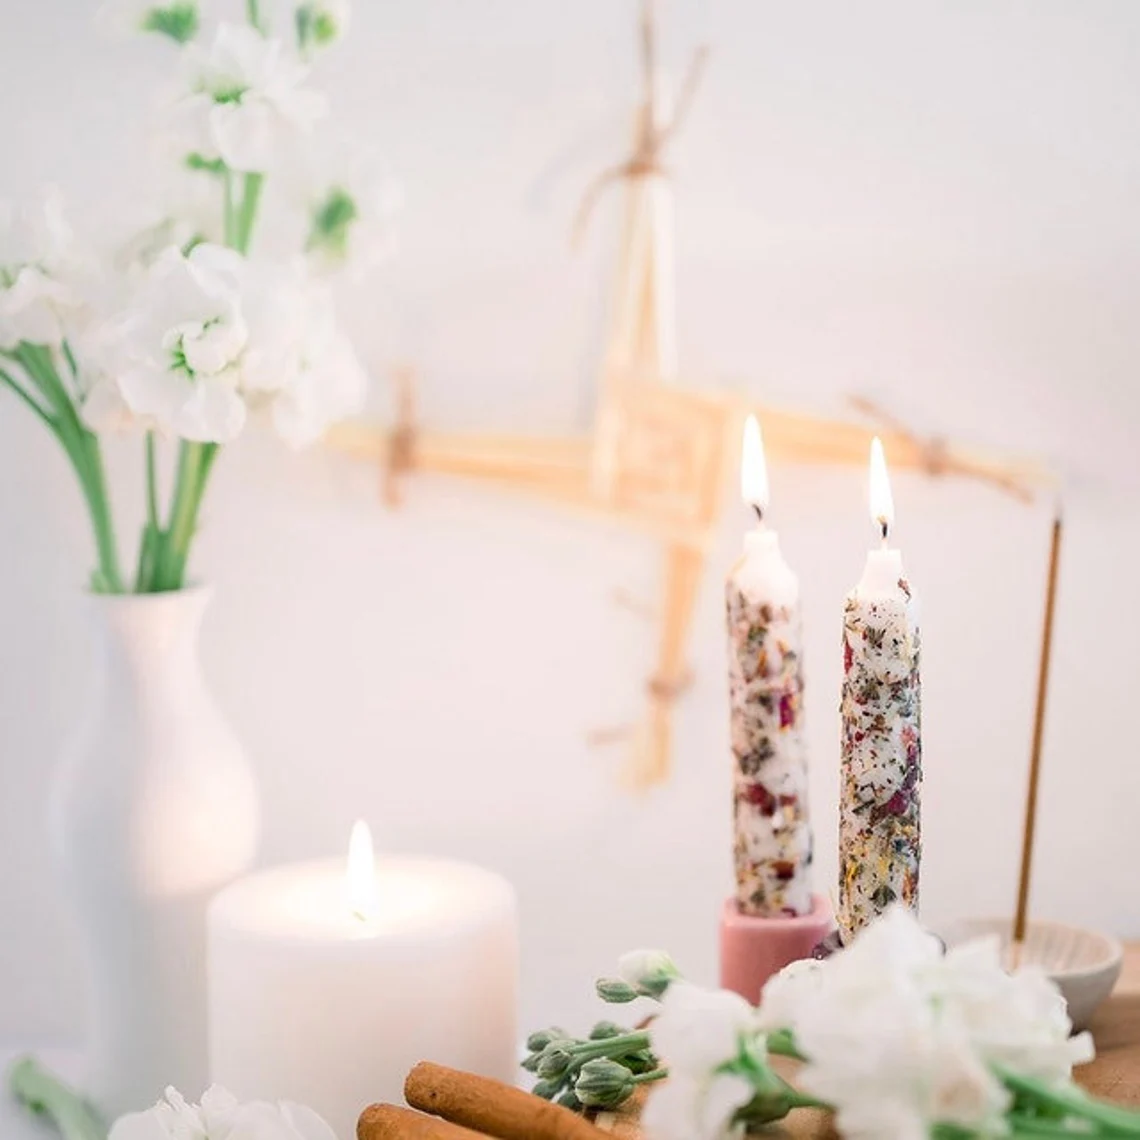
Our Handmade Herbal Soy Chime Tapers are built with exactly this rhythm in mind. Each one is dressed with botanicals by hand — dried herbs and flowers pressed into the soy wax — so that lighting it engages more than sight. There’s scent as the herbs warm, texture in the visible botanical dressing, and the soft, steady burn quality that soy wax is known for. It becomes a small multi-sensory anchor for the same two or three minutes each day, which is often all a beginner’s ritual needs to actually stick.

A Simple Way to Begin

If you’re new to this, you don’t need a script. Try this:

  1. Clear your small space — just the surface where the candle will sit.
  2. Light the chime taper and take three slow breaths as the flame settles.
  3. Name one intention for the day, silently or out loud — a word, a feeling, a single sentence.
  4. Sit with the candle for as long as feels natural. There’s no required minimum.
  5. When you’re ready to move on, either let the taper burn down (it’s sized for this) or extinguish it gently, knowing you’ll return to that same space tomorrow.

That’s the whole anatomy of it: a cleared space, a small flame, a few minutes of attention. The ritual doesn’t need to be bigger than that — it just needs to be repeated.

Posted on — Leave a comment

How to Stop Killing Your Succulents

The 72-Hour Rule Every Plant Parent Needs

If you’ve ever pulled a mushy, yellowing succulent out of its pot and wondered what went wrong, you’re not alone — and you’re probably not actually “bad” at keeping plants alive. You’re just using the wrong dirt.

The Real Killer Isn’t Overwatering. It’s Overstaying.

Here’s the thing nobody tells new plant parents: succulents and cacti evolved in environments where rain is rare but, when it comes, it drains away almost instantly. Their roots are built for a quick soak-and-dry cycle, not for sitting in damp soil for days on end.

The problem is that most “houseplant dirt” — including a lot of generic potting mixes sold right next to the succulents at the garden center — is formulated for tropical foliage plants that like consistent moisture. That soil is dense, holds water like a sponge, and stays wet for a week or more after a watering. For a pothos or a fern, that’s ideal. For a succulent, it’s a slow death sentence.

When roots sit in moisture they can’t use, they stop being able to breathe. Oxygen gets locked out, anaerobic bacteria and fungi move in, and root rot sets in — often invisibly, underground, for weeks before you ever see a mushy leaf. By the time the plant shows you it’s in trouble, the damage is usually already extensive.

Enter the 72-Hour Rule

Here’s a simple mental model that changes everything: a properly draining succulent soil should be essentially dry to the touch within 72 to 96 hours of a thorough watering.

That window isn’t arbitrary — it mirrors the wet-to-dry cycle succulents are adapted to in nature. If you water your succulent and the soil is still visibly damp a week later, that’s not a sign you should water less. It’s a sign your soil is the problem, not your habits.

This is also why the “just water less” advice so many people get doesn’t actually fix anything. You can water a succulent in bad soil once a month and still kill it with root rot, because the issue was never frequency — it was drainage. Meanwhile, you can water a succulent in properly draining soil more often than you’d expect and the plant will be totally fine, because the roots never sit wet long enough to suffocate.

What Makes a Soil Actually Drain Fast

Fast drainage comes down to particle size and structure, not marketing claims. A mix needs:

  • Large mineral particles (think coarse sand, pumice, or perlite) that create air pockets between soil particles, so water has somewhere to go instead of clinging to fine organic matter
  • Minimal water-retentive organic material — a little is fine for nutrients, but too much peat or compost acts like a sponge
  • A structure that resists compaction over time, so the drainage properties don’t degrade after a few waterings

This is exactly what our Succulent & Cactus Soil Mix is engineered around. It’s built as a quick-drain formula specifically calibrated to that 72–96 hour dry-down window — not because it’s a nice bonus feature, but because that window is the actual mechanism that prevents root rot in the first place.

The Safety Net for Chronic Over-Waterers

Here’s the part that matters most if you know you tend to water too often (or forget which day you last watered, or just love tending your plants a little too enthusiastically): the right soil forgives you.

You don’t have to become a different kind of plant parent, track a rigid schedule, or set phone reminders you’ll ignore anyway. If the soil itself drains within that 72–96 hour window, an extra watering here and there simply doesn’t have the same consequences — the excess moisture is gone before it can cause damage. The soil does the disciplined part so you don’t have to.

That’s really the whole philosophy behind this mix: instead of asking you to fight your instincts, we built a soil that works with how most people actually water.

The Takeaway

If your succulents have been struggling no matter how carefully you water them, stop blaming your watering can and start checking your soil. Press a finger into it three or four days after watering — if it’s still cool and damp, that’s your answer.

Switching to a mix engineered for that fast dry-down cycle is often the single biggest change you can make for succulent survival, more impactful than any watering schedule, plant light, or fertilizer routine. It’s the difference between soil that punishes small mistakes and soil that quietly absorbs them.


Organic Succulent & Cactus Soil: Vegan Potting Mix

Price range: $8.00 through $28.00
Nutrient-Rich Succulent & Cactus Soil Mix
By popular demand, our very own custom-blended, premium Succulent and Cactus Soil Mix is finally available to bring home! Specially formulated for small indoor or outdoor potted succulents, cacti, and terrariums, this fast-draining blend delivers big-time growth without the risk of root rot.
Whether you tend to over-water or under-feed your green companions, this easy-to-use mix strikes the perfect balance to keep your wonderful plants thriving.